1 liter of warm water and 3 teaspoons of sea salt = The Salt Water Cleanse. I was already planning on doing a cleanse this year, so I decided to give it a shot. My first initial thought was why would anybody do this? I love salt...but not a liter of warm salt water-Gross. That should have stopped me but it didn't. The easiest way to get it down is in 4 cups. The first 2 cups were pretty easy compared to the last 2 which had me dry heaving. Exactly 1 hour after consuming the concoction the cleanse started to work brilliantly. Let's just say it literally clears out your entire intestinal track. Who knew salt could be so good for you.
You want me to do what?DIY 10,000 Steps a Day
.jpg) Sure, 10,000 steps (5 miles) a day, seems impossible, but it is 100% doable. Ever since I was gifted with the pedometer, the FitBit, I've been on a roll. In previous years I've owned a couple different pedometers, which in all honesty were a joke compared to the FitBit. This nifty gadget is extremely accurate (trust me, I've tried to cheat) and it gives some great information, i.e. steps, miles, calories, active measuring. If that doesn't get you excited, you might like the fact that the battery life is unbeatable, you rarely have to plug it in.
Sure, 10,000 steps (5 miles) a day, seems impossible, but it is 100% doable. Ever since I was gifted with the pedometer, the FitBit, I've been on a roll. In previous years I've owned a couple different pedometers, which in all honesty were a joke compared to the FitBit. This nifty gadget is extremely accurate (trust me, I've tried to cheat) and it gives some great information, i.e. steps, miles, calories, active measuring. If that doesn't get you excited, you might like the fact that the battery life is unbeatable, you rarely have to plug it in. Anywho, some of you may be wondering, why take on the 10,000 step challenge? Well isn't it obvious, I work a 9-5, which means I sit in a chair all day. That's right, a chair, 8 hours a day, 5 times a week. Thrilling, I know, but very bad for my health. You would think sitting all day would make someone fully rested and ready to hit the gym come 5pm, right? Ha, just the opposite, for some reason I'm more inclined to cruise home to my comfy couch. It seems that by 3pm lethargy kicks in, making my morning aspiration of hitting the gym after work non existent.
Here are some fun stats to think about when sitting:
- Sitting 6+ hours per day makes you up to 40% likelier to die within 15 years than someone who sits less than 3. Even if you exercise.
- Sitting makes us fat. 1 in 3 Americans is obese.
- With the advent of TV, computers, and the desk job, we're sitting down more than ever before in history: 9.3 hours a day, even more time than we spend sleeping (7.7 hours).
- How sitting wrecks your body: Enzymes that help break down fat drop 90%, Electrical activity in the leg muscles shuts off, calorie burning drops to 1 per minute.
- Those who sit 3 hours or more per day are 64% more likely to die from heart disease.
Here are some tips to reaching 10,000 steps:
- Wake up 30 minutes earlier and stroll around the neighborhood. It doesn't matter if your in your PJ's or workout gear, personally I wear whatever I can get my hands on without opening my eyes. The main goal is to get some activity, it doesn't matter if it's a mile or 30 steps, anything is better than nothing.
- Park your car at the very back of the parking lot. Sure, we all want the front parking spots, but think of it as a win-win; your getting more steps and allowing others to benefit from your generosity.
- Take your 2 ten minute breaks and go for a walk. It's okay to use them, it's the law.
- Walk during your lunch break. This one is pretty tough, but grab a buddy or your Ipod, and cruise out the door. Sure sneakers and dress pants aren't the best look, but you never know who will be inspired by your courageous fashion statement and want to join in on the walking trend.
- Fill up your water bottle (You should be drinking half your body weight in ounces). Everybody can benefit from drinking more H20, trust me I'm one of them. This nifty one will give you extra steps to the kitchen and bathroom.
- If at the end of the day you're pooped and not in the mood to hit the gym, simply go home, drop off your stuff, and head back out for a walk. If the thought of changing clothes deters you, then don't, just head out the door. The moment you take this step, you'll feel empowered by the thought of obtaining your goal. For me, it's a pain to head to the gym sometimes, but to walk outside? shoot that can't be to hard, right? Exactly, even if that means doing constant laps around the neighborhood.
P.S. Check out the Nike Ipod nano pedometer:
Nike iPod nano 8G 6th generation - Pink, ONE SIZE
DIY Stencil Painting
I love DIY (Do It Yourself) projects. As a novice, with very little creative talent, I wanted to put my "skills" to work. Stencil painting did the trick. Why stencil painting? It's easy, clean, and almost effortless. For those who need inspiration, like myself, Martha Stewart online provides a variety of creative DIY projects. To be honest, I'm not a Martha Stewart fan, but it fit the bill. I'm very satisfied with my creation, and even hopeful for the next.
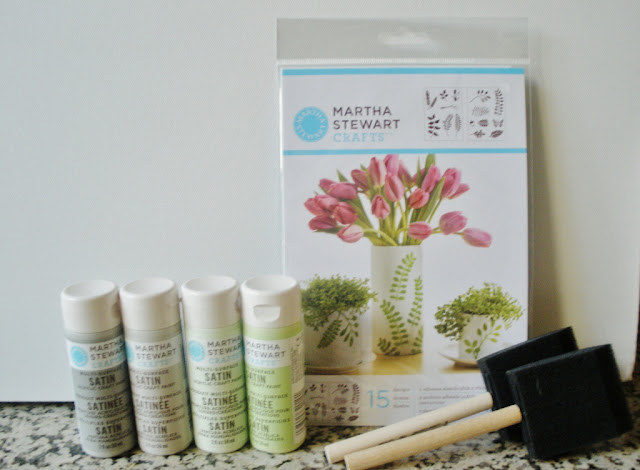
If you want to create your own, here's what you'll need:
1. Canvas, any size will work (The canvas I used was a 36" x 36")
2. Martha Stewart Stencils
3. Stencil paints (Choose any colors that spark your interest)
4. Sponge brush
If you want to create your own, here's what you'll need:
1. Canvas, any size will work (The canvas I used was a 36" x 36")
2. Martha Stewart Stencils
3. Stencil paints (Choose any colors that spark your interest)
4. Sponge brush
 |
| I used the following Martha Stewart paints: Wet Cement, Artichoke, Scallion, and Lake Fog |
 |
 |
| I'm no Picaso, but say "Hello" to my masterpiece. |
DIY Rolled Magazine Vase
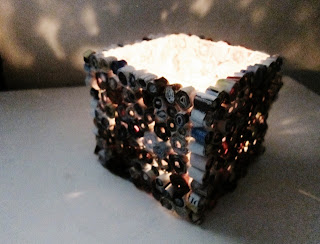
Attention contemporary art fans, I've got just the DIY project. Rolled magazine art is a great and inexpensive way to add flare to your style. I was hooked on the technique after viewing a couple projects online. I believe in functionality, so I wanted to create something with purpose. That being said, what could be better than a vase? It holds flowers, candles, and endless amounts of knick knacks. This project was fairly inexpensive but somewhat time consuming. The creation itself looks awesome, but expect to work your fingers to the bone. The smartest way to complete this project is to coherence some friends or family to help you. Would I do this project again? Absolutely! If you're interested in creating you're own, check out my tutorial below
Rolled Magazine Vase Tutorial
Items needed:
1. Glass Vase (square or round)
2. Magazines
3. Hot glue gun + glue sticks
4. Scissors
Instructions
Step 1. Rip out a magazine page and use the scissors to cut the page into 3 even strips
Step 2. Take one piece and fold it in half (Repeat 2 more times to the same piece. Make sure to fold in the same direction as the first fold)
Step 3. Start at one end and tightly roll the piece of paper
Step 4. Once rolled, put a dab of glue on the end to hold it from coming apart
Step 5. Add a good amount of glue to the back of the rolled piece and place it on the vase
Step 6. Repeat steps 1-5 until the entire vase is covered.
DIY Chai Latte
Tired of waiting in line and being over charged at Starbucks? Join the club. I had no idea how easy and inexpensive a "Do it yourself" chai latte could be. Take a stab at my 2 step chai latte , you'll thank me later. I promise. This reciepe will save you time, money, and taste like christmas. Enjoy!
Ingredients Needed:
Ingredients Needed:
1. 1 carton of either unsweetened or sweetened vanilla almond milk
2. 1 carton of Oregon Chai (Available at Trader Joes)
STEPS
Step 1. Fill 3/4 of the glass with Almond milk
Step 2. Fill the rest of the glass with Oregon Chai
Step 2. Fill the rest of the glass with Oregon Chai
DIY Cat Scratch Pads
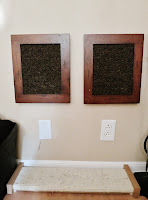
 I love my DIY cat scratch pad! It was super easy to make and I was pleasantly surprised how quickly my cats started using it. To create your own, click the following link for instructions. DIY Cat Scratch
DIY Kitty Condo

Total Cost: Less than $40
Materials
Tools
For Step-by-Step Instructions Click Here: DIY Kitty condo
DIY German Pancake Recipe
Ingredients
German Pancake Toppings
 Step 1. Preheat oven to 425 degrees
Step 2. Put 1/3 cup of butter in a 9x13 pan and place in preheated oven to melt
Step 3. In a medium bowl, whisk together the eggs, milk, and flour to make a smooth batter. Set aside.
Step 4. Pour batter directly in the middle of the 9x13 pan
Step 5. Place in oven to bake for 23 minutes
Step 6. Take pan out of oven and set aside to cool for 5 minutes
Step 7. Dress German pancake with toppings
- 4 eggs
- 1 cup milk
- 1 cup Flour
- 1/3 cup butter
German Pancake Toppings
- Powder sugar
- Strawberries
- Syrup
- Whipped Cream
- 4 people
 Step 1. Preheat oven to 425 degrees
 Step 2. Put 1/3 cup of butter in a 9x13 pan and place in preheated oven to melt
Step 3. In a medium bowl, whisk together the eggs, milk, and flour to make a smooth batter. Set aside.
Step 4. Pour batter directly in the middle of the 9x13 pan
Step 5. Place in oven to bake for 23 minutes
Step 6. Take pan out of oven and set aside to cool for 5 minutes
Step 7. Dress German pancake with toppings
DIY Berries & Cream Recipe
Ingredients
Directions
 Step 1: Take a handful of both types of berries and wash them thoroughly
Step 2. Cut the Strawberries in fourths

Step 4. Add as much Whipped Cream as desired on top of berries
- Strawberries
- Raspberries
- Whipped cream
Directions
 Step 1: Take a handful of both types of berries and wash them thoroughly
Step 4. Add as much Whipped Cream as desired on top of berries
DIY Propagating Succulents
Succulents are one of the few plants that can be propagated. What does that mean? A single succulent leaf, when cut and planted, can produce a new succulent. Propagating succulents is an easy and great way to increase your collection. Before you start de-leafing your plants, it's good to note that not all succulents can be propagated. Since I'm obsessed with having succulents in my wedding, I've decided to try propagating my own batch. If interested in propagating succulents, check out my tutorial below.
Succulent Propagating Tutorial:
Succulent Propagating Tutorial:
Step 1. Gather leaf cuttings (Break the leaf off at the stem)
Step 2. Place leaves out for 3 days (Don't put in direct sunlight)
Step 3. After 3 days, plant each leaf tip barely under soil (Use cactus soil)
Step 4. Once roots are visible, plant firmly under soil
Step 5. Water once a week, and watch them grow!
Caution: If your succulents start looking bleached out or the tips start to turn orange, take immediate action and place succulents in indirect lighting. This is the first sign that the plant is getting too much direct light and if you catch it early enough, the succulent will restore to its natural coloring after a couple weeks in indirect lighting. The picture below is an example of too much direct light.
Subscribe to:
Comments (Atom)


.jpg)
.jpg)


